A rooftop lounge can look finished in a rendering and still fail procurement the moment real constraints show up: elevator dimensions, wind exposure, hot surfaces, cleanability, and a bar team that needs clear paths at peak hour. A Rooftop Lounge Package Example That Specs Clean can demonstrate how to address these issues with the right module and specification choices. The fastest way to keep a rooftop on schedule is to stop thinking in single hero pieces and start thinking in packages – clear counts, repeatable modules, and a spec strategy that keeps substitutions painless.
Below is a rooftop lounge furniture package example written the way a procurement team can actually use it: zoning first, then piece counts, then the specs and trade-offs that typically decide whether a rooftop performs for years or becomes a maintenance story.
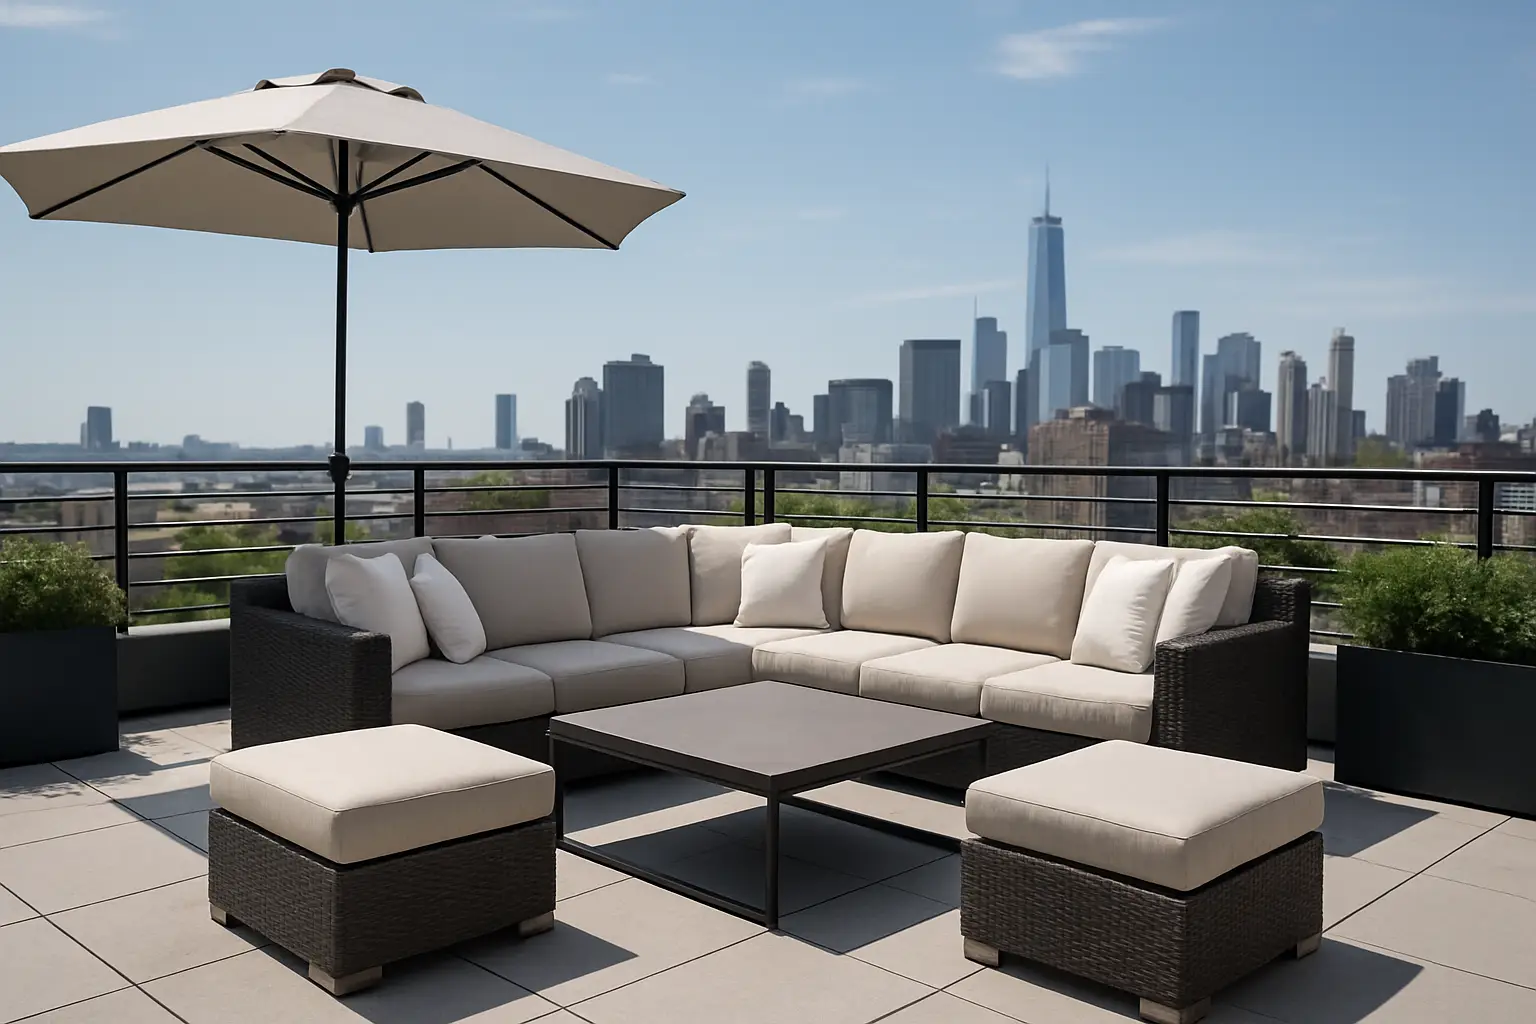
The rooftop lounge furniture package example (80-100 seats)
Assume a mid-size hospitality rooftop: roughly 2,500 to 3,500 square feet of usable guest area, a central bar, and a mix of sun and shaded edges. The goal is comfortable linger time without blocking service, plus enough variety to support couples, groups, and VIP reservations.
The package is organized the way most buyers and designers already specify: Lounge, Dining/Bar-height, Shade, and Accessories. Counts below are realistic for budgeting, freight planning, and mock-up approvals.
Zone 1: Main lounge clusters (about 36 seats)
This is the visual anchor – what guests see in the first five seconds and what shows up in marketing photos. You want scale without clutter, and you want modules that can be reconfigured if the operator changes programming.
Use six conversation clusters. Each cluster can be a 3-seat sofa plus two lounge chairs, or a modular sectional that approximates that seating count.
- 6 contract-grade outdoor sofas (3-seat)
- 12 lounge chairs (club-style)
- 6 coffee tables (low)
- 6 side tables (small, pull-up)
If your rooftop has wind exposure, keep the coffee tables heavier and lower-profile, and treat side tables as optional. If there is a hard nightlife program (bottle service, constant glassware), favor tops that wipe clean quickly and don’t show rings.
Zone 2: Perimeter “view” seating (about 20 seats)
Perimeter seating sells the rooftop. It also gets punished by sun, dust, and guests who lean back and drag chairs. The best approach is repetitive, narrow footprints with comfort that feels intentional.
Use ten paired lounge chairs facing the view with small shared tables.
- 20 lounge chairs (slimmer silhouette, deep enough to relax)
- 10 drink tables (compact round or square)
Trade-off: slim chairs help circulation, but too-light frames can migrate in wind. If you’re on a tall tower, confirm ballast strategy or specify frames with sufficient weight and non-marking glides.
Zone 3: Bar-height social zone (about 24 seats)
Most rooftops need a standing-to-sitting gradient near the bar. Bar-height sets increase energy and revenue per square foot, but only if stools are stable, comfortable, and easy to reset.
Plan for a mix of 2-top and 4-top bar-height tables.
- 4 bar-height tables (30 to 32 in square, 4-top)
- 4 bar-height tables (24 in round, 2-top)
- 24 bar stools (with backs for longer dwell time)
If space is tight, consider fewer tables and a higher percentage of stools per table only if staff can keep pathways clear. Many rooftops look fine at install and then fail during service because stool pullback conflicts with the main aisle.
Zone 4: Low “cabanas” or VIP lounges (about 12 seats)
This is the premium reservation driver. Keep it visually distinct, but don’t make it so custom that lead times or replacement parts become a problem.
Use two VIP pods.
- 2 modular sectionals (6-seat each) or daybed-style lounges
- 2 large coffee tables (oversized, stable)
- 4 side tables (shared)
A VIP zone should read as a destination, so finishes can be bolder here. The practical note: this zone sees spills. Choose cushion fabrics and top materials that clean quickly without leaving a halo.
Shade plan (covers 50-70% of seating)
Shade is not an accessory on a rooftop. It’s an occupancy tool. A space that looks full at 7 p.m. can be empty at 5 p.m. if the sun is punishing.
You can cover this package with a combination of cantilever umbrellas and smaller center-pole umbrellas depending on structure and wind.
- 6 cantilever umbrellas (large coverage over lounge clusters)
- 4 market umbrellas (over bar-height tables or perimeter pairs)
- 10 weighted bases rated for rooftop wind conditions
It depends: some buildings restrict roof penetrations or require specific base types. Don’t assume you can anchor into the deck. Plan base weight and footprint early so you don’t lose seating density later.
Accessories and operational add-ons
Accessories are where rooftop packages either become guest-ready or stay “almost finished.” Keep these simple but intentional.
- 12 outdoor-rated accent pillows (easy refresh, brand color option)
- 2 to 4 outdoor heaters (where climate and codes allow)
- 6 planters (used as soft space dividers, not aisle blockers)
- Protective covers for VIP and primary lounge (optional, but often pays back fast)
If storage is limited, prioritize covers for the pieces with the highest cushion volume. That’s where labor and replacement costs accumulate.
How this package fits real rooftop constraints
A package is only “good” if it survives the realities of rooftop operation. These are the constraints that should shape your spec decisions before you finalize SKUs.
Circulation and service clearances
Rooftops fail when furniture looks generous but behaves like obstacles. In early layout, maintain a primary service loop that staff can run with trays, plus secondary paths to VIP and perimeter seating. If you need to choose, reduce table sizes before you reduce aisle width. Tight aisles become chronic service delays and guest frustration.
Heat, UV, and surface comfort
Metal looks sharp on paper. On a rooftop at peak sun, unprotected metal can become physically uncomfortable. If you specify aluminum frames, pair them with thoughtful arm caps, textured coatings, and cushions that hold shape. Table tops should resist heat and UV without becoming high-maintenance.
Wind and tip resistance
Rooftops experience gusts that ground-level patios never see. This affects umbrellas, lightweight chairs, and anything tall. Choose lower, wider pieces in exposed zones and avoid tall, narrow side tables in perimeter areas unless they are properly weighted.
Cleaning, stains, and replacement strategy
Hospitality rooftops live or die on turnaround time. Choose cushion fabrics designed for outdoor use and cleaning, and keep the number of unique fabrics reasonable. A rooftop with eight different cushion colors looks curated on install day and becomes a re-order headache later.
Spec notes that keep approvals and re-orders simple
If you’re building an approval path with ownership, brand standards, and procurement, you want a short list of non-negotiables.
Frames: powder-coated aluminum is a common rooftop baseline because it balances weight, corrosion resistance, and cost. Teak and other hardwoods can be beautiful, but they demand a maintenance plan and consistent care to age predictably.
Cushions: specify quick-dry foam or an equivalent outdoor cushion construction based on your climate and cleaning routine. If staff will wipe nightly and cover regularly, you can prioritize comfort. If cushions will be exposed to sudden weather, prioritize drainage and faster dry time.
Table tops: choose a surface that tolerates beverage rings, sanitizers, and heat. If you need a stone look without weight or fragility, consider engineered outdoor tops that reduce cracking risk and simplify freight.
Shade: confirm wind rating and base strategy early. Umbrellas are typically the first line item to get cut, then the operator realizes the rooftop is unusable for large parts of the day. Shade is revenue protection.
Budget logic: where to spend and where to standardize
Spend on the pieces guests touch the longest: lounge seat comfort, stool ergonomics, and umbrella stability. Standardize on repeatable frames and finishes across zones so future expansions or replacements don’t look like a different venue.
If value engineering is required, reduce accessory density and number of unique table shapes before reducing seating comfort. Guests forgive fewer pillows. They don’t forgive uncomfortable chairs.
Procurement workflow that reduces risk
A strong rooftop package is only half design. The other half is execution: drawings, approvals, manufacturing control, and delivery coordination.
A typical low-friction workflow is: confirm the seating target and zone plan, select a tight finish palette, review a 3D layout for clearances, approve a small mock-up set for comfort and finish accuracy, then lock counts and ship in a phased plan if the building has delivery windows.
For teams that want one accountable supplier across lounge, dining, shade, and accessories – plus in-house design support for layouts and approvals – PNZ Space Global can support rooftop packages end-to-end through its vertically integrated model and project services (3D drawings, mock-up approvals, and coordinated delivery) at https://www.pnzdesign.com.
A final thought for rooftops that need to perform
Treat your rooftop package like a repeatable system, not a collection: fewer SKUs, clear zones, and specs chosen for wind, cleaning, and service flow. When the venue is full and the staff is moving fast, that discipline is what makes the space feel effortless.